PuzzleMaster

Magic Dice

Posted on May 31, 2012 by Gabriel | 0 comments
Labels: , ,

(Click to Enlarge)
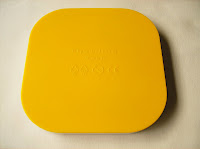
Dice... An object always seen as a sign of luck. However, the one I'm about to review has little to do with luck, or does it? It may depend on how you interpret its challenge. The Magic Dice is actually a hidden maze (or semi-hidden) puzzle with a marble inside. The goal is to get the marble out of the internal maze through the dice's "face one", as the other's aren't large enough.

The puzzle is beautifully crafted in wood, measuring 7cm (2.75") and it's very well polished. The edges were rounded and each of the face's patterns has holes representing the dots in the dice. These holes have a very practical use, since you get a glimpse of the internal maze while guiding the marble, and also to see where's the marble at any given moment. That's why I wrote "semi-hidden" above, because the maze is not entirely hidden if you can see part of it through the holes. It would help even more if the dice was made in transparent plastic, but otherwise it wouldn't be as much of a challenge and more like a dexterity puzzle.

(Click to Enlarge) - Internal Maze Close-Ups

The first time you play with the puzzle, all you hear is a rattling inside. Later on, you can actually see the marble through the holes in the puzzle and this way, start guiding it until you can reach the face one. You won't be able to see all of the maze's path, but the little you'll be seeing is enough to get a good idea, like its corners and where they'll lead. If you're thinking about cheating by removing the lid of the puzzle, think again, because all of the dice's faces are perfectly glued together. It's just you, the maze and the marble.

The level of difficulty in the puzzle is not that high. In fact, Brilliant Puzzles classifies it as a level 2/5 (Intermediate/Tricky). At first, I was making random moves with the dice trying to get the marble out, but soon I noticed part of the maze was visible. So, about 10 minutes later, the marble was finally freed from the cube. It's not that easy to memorize the internal maze, but subsequent attempts took approximately the same amount of time.

(Click to Enlarge)

Closing Comments:

A simple concept and yet brilliantly executed. It's not a very challenging puzzle, but it can still be quite fun to play with. The dice theme fits perfect with the hidden maze, as the pattern made by the holes are there to help you in the solving process, otherwise it could have been just decorated with dots. The quality is superb and the design is flawless. Also makes for a perfect gift.

As for luck, I don't think you'll be needing it...

Availability: The Magic Dice came from the Brilliant Puzzles online store and it's available for about $11 USD. Considering the high-quality of the puzzle, I strongly recommend it, because you'll get your money's worth.


Around the Barn

Posted on May 30, 2012 by Gabriel | 0 comments
Labels: , , ,

(Click to Enlarge)
Continuing my reviews on Puzzle Crafthouse's designs, today's post is about another great puzzle by Dave Janelle, "Around the Barn" which, as its name suggests, has nine different objects and animals related to the life around the barn.

This edge-matching puzzle is comprised by nine octagon-shaped pieces that need to be placed in the frame so that all edge sides next to each other have the same symbol. The symbols are perfectly engraved into the pieces made from Alder wood, and show an incredible level of detail, considering that each piece measures about 4.5cm (1.8").

Dave decided to make the puzzle a little more difficult than your average edge-matching puzzle by getting eight symbols per piece instead of the usual four or even six. While the puzzle is considered to be a level 3+ difficulty, expect to spend a little while "going in circles" around the barn looking for the correct solution. The puzzle is believed to have two different solutions, excluding rotations or mirrored images, but if you do find out more, contact Dave, because he would like to know about them.

Edge-Matching puzzles, particularly the more complex ones, have a fair amount of luck involved that will be essential to determine whether you can solve the puzzle in just a few minutes or in several hours. Suffice it to say, I wasn't lucky enough to fall in the "minutes" category, but rather in the hours', although it was just two of them. I say two, but it could have been much more. It's all about how you choose the pieces and how you manage the available pieces and their symbols.

(Click to Enlarge) - Not Solved

I found that there's a couple of subtleties in the pattern of the symbols you can use to your advantage. If you look closely, one of them is easily spotted, as it's the only one with the same exact symbol repeated four times in a single piece. This special piece can be placed in a strategic spot in the frame, making the solution a lot more easy and with far less possibilities. I have tried to find the second solution with this in mind, by removing a few peripheral pieces and replacing them with others, but haven't succeeded yet.

Solution: Click here, if you'd like to see the puzzle in its solved state.

Closing Comments:

The outstanding visual appearance of the puzzle alone is sufficient to captivate the attention of any puzzle aficionado or collector, but the challenge itself is also worth a try, for its eight symbol pieces are something you don't see everyday.

Availability: The "Around the Barn" puzzle is available only at Puzzle Crafthouse for $14 USD. If you want a custom designed puzzle with other symbols, just contact the store and they'll do it for you. Other types of wood are also available.


Moeraki 3

Posted on by Gabriel | 3 comments
Labels: ,

(Click to Enlarge)

The Moeraki puzzles are an invention of Kasimir Landowski in colaboration with Ivan Moscovich, and are distributed by Casland Games. They were first shown to the public at the Nuremberg's International Trade Fair in 2008. Their curious name was chosen after the Moeraki Boulders in New Zealand, for their unusual shape and placement.

The Moeraki is a Sliding puzzle with colored beads, consisting of a certain number of intercepting rings. The goal is to randomly mix the beads and return them to their original color position. There are 5 versions with different bead arrangements, ranging in difficulty from simple to complex, although only two have been released into actual physical puzzles (no.3 and no.4). All 5 versions can be purchased as downloadable windows games on the Casland Games website, with iPhone, iPod and iPad versions as well. You can try a demo version here.

The first version that I will be reviewing is the Moeraki 3 (stay tuned for my Moeraki 4 review or in the meantime, check out Neil's review). This is the easier of the two physical puzzles and actually, from all five. It has two oval rings intercepting perpendicularly and the beads have five different colors: 16 white beads in the middle and 8 green, 8 yellow, 8 red and 8 blue in the four extremities of the rings.

The beads of the Moeraki resemble the classic Orb-it puzzle, although the Moeraki ones are about double the size, and the concept resembles the Hungarian Rings, except it has the rings intercepting at an horizontal plane and has two intersecting points (the Moeraki 3 has four intersecting points). These are the only similarities, however, as the Moeraki has its own original features and characteristics.

I was positively very surprised by its size, compared to other puzzles in this category, measuring about 13,5cm in length (5.31"). I was also very pleased by its presentation and premium quality. Each Moeraki puzzle comes with its protective transparent case and the actual puzzle itself is heavy and has a very sturdy feel, even though it's made of plastic. Not cheap-looking, at all.

(Click to Enlarge) - Moeraki w/ protective Case

PC Version

Each puzzle is accompanied by a free CD-ROM with its correspondent PC version, which can prove to be very useful indeed. With the computer version, you can train all you want before attempting and adventuring yourself with messing up the puzzle. The virtual game comes in 3 versions and has 17 types of balls and backgrounds. The first version has two colors: one for the middle balls and the other for the rest, and the objective is to only get the central beads in the correct place. The second version has three colors: one for the middle and the other two, one for each ring. Finally, the third version is the real deal and after you easily solve the second version, this won't be that much harder.

(Click to Enlarge) - Left - 2 Color Version; Middle - 3 Color Version; Right - 5 Color Version

I found the PC version very accessible and easy to play. I actually played it before solving the plastic puzzle and I think it can be very useful for practice. It sort of ends your fears of messing up the puzzle and not being able to solve it afterwords. If there's something I hate in my collection, is having unsolved puzzles just lying around.

Plastic Version

After I was able to solve the Moeraki 3 in the computer, I was ready to finally have a go in the actual physical puzzle. Being able to touch and feel the beads is so much better... I have to mention, the movement of the beads is very smooth. I was expecting something very noisy and jamming of the beads, but again, I was very satisfied by another pleasant surprise.

A unique feature of the Moeraki 3 is having the rings intercepting at a 90º angle. What does this have to do with solving? - Consider an imaginary line passing through the middle of the puzzle. This will create a mirror effect, so what you do on one side of the ring, will affect the opposite symmetrical side, thus when you're solving the blue color, for example, the opposite color, yellow, will be automatically solved on its own. The same applies for the other ring. If you solve the red, then green will also be solved. So, as you can see, you only need to manipulate two adjacent colors to solve the entire puzzle.

Note: To ensure a proper random starting position for a good solving experience, be sure to shuffle the puzzle so that no two of the same colors are touching.

(Click to Enlarge) - Perfectly Shuffled

I have solved the Moeraki 3 several times already. Sometimes it can take only a couple of minutes and others, up to 10 minutes. In most of these times, I can manage to solve it and leave only one colored bead off place (two actually, but seeing as they are mirrored, if I get it in the right place, the other one will be too), needing several tries to fully solve it. I'm yet to come up with a solid method and strategy to solve it in one go, but I'm getting there...

VIDEO - Here's a YouTube video to better show the movement of the puzzle and its characteristics. Since I have yet to fully master a proper solve in sufficient time, I didn't solve it in the video, as it could be longer and just plain boring...

Closing Comments:

Suffice it to say, I loved everything about the Moeraki 3. It's a joy to play with. The presentation is fantastic and the quality is flawless. From the size of the puzzle, to the smooth bead movement, and also the extra PC version, it's everything a puzzle lover could ask for. I can highly recommend it to anyone, not only experienced puzzlers, but also casual puzzlers that like the occasional challenge and puzzle collectors for its beautiful appearance.

The Moeraki 3 can be purchased at the Casland Games website for about €15.

(Click to Enlarge) - Left - Bottom View w/ CD; Right - Bottom View w/o Case

Links:

Moeraki Boulders - If you happen to visit this corner of the Earth, check out the Moeraki Boulders on Koekohe Beach in New Zealand.


Scorpion

Posted on May 29, 2012 by Gabriel | 0 comments
Labels: , , ,

(Click to Enlarge)
PuzzleMaster's Wire Puzzles have been making regular appearances in my reviews for some time now, not only because they're quite the challenge, but also because they have a great price/quality relationship. The Scorpion, another original design, is yet another nice example of the wide selection of wire puzzles you'll discover at the Canadian puzzle store.

Design-wise, if it weren't for the name, I would have had a hard time finding out that the puzzle is supposed to look like a scorpion. Maybe the back of the wire frame slightly resembles a scorpion shape... Besides the wire frame, there's also a string with two attached rings and two beads. The goal is to remove the larger ring from the puzzle.

Rated as a level 8/10, I would say that's about right for the kind of challenge you'll encounter. I have definitely solved harder level 8 puzzles, although the solution is anything but simple. With a mixture of wire and string - an explosive mixture, I might say - there's plenty of room to make some unwanted knots. My advice is to avoid at all costs make more than the necessary loops around the frame. Try to remember your steps, as it may become crucial to "rewind" from a mistake.

The two beads are there for a reason, since they're large enough to not pass through the Scorpion's body. The rings below the beads also can't go through the main ring. I've been saying in previous reviews to pay close attention at the puzzle's features and unusual characteristics, but in this one, let's just say that there's more than it's actually needed. In other words, there may be parts of the puzzle that are there just to lead you in the wrong direction. I know, because I've spent a good time there, and only after a while I decided to try something else. I'm not saying much about the solution, but I can tell you that it's way simpler than you might think, as looks can be deceiving.

Solution: For a .pdf of the solution, click here.

(Click to Enlarge)

Closing Comments:

What more can I say? - Another great puzzle by PuzzleMaster. The beauty of the Scorpion lies in the solution itself and how much you can change the appearance of a puzzle to make it even more complex. If you like wire puzzles, go for it. If you don't like someone, offer them one...

Availability: The Scorpion puzzle is available at PuzzleMaster for just about $10 CAD, as well as many others in their wire brand. They also have a very similar puzzle, the Scorpion's Sting, but I'm intrigued as to how it can be a level 10 if it's almost identical.


Screwy Octahedron & Nuclear Fusion by George Bell

Posted on May 28, 2012 by Gabriel | 0 comments
Labels: , ,

(Click to Enlarge)
Today, I'm not reviewing one puzzle, but two by the puzzle designer George Bell. These puzzles were 3D-printed by Shapeways and can be easily purchased at the designer's Shop.


(Click to Enlarge)

The first puzzle that I will talk about is the Screwy Octahedron, a nice little puzzle with just 5cm in diameter (2"). It was George's exchange puzzle for the 2010 30th IPP in Osaka, Japan. With the color choices of orange, blue, red and green, it wasn't hard to pick it in my favorite color. Note that when you order it from Shapeways, it will arrive undyed unless you request it otherwise, which will have an extra cost. You can purchase it directly from the designer already dyed. George also has a very helpful guide on how to dye your own puzzles.

The puzzle consists of four pieces comprised by small spheres joined together. I was particularly interested in sphere puzzles after a recent review for a pyramid puzzle, also comprised by spheres, so I decided to give this one a try. It's a nice change from the cubic-based puzzles. Three of the pieces have a screw-like shape with two being identical and the other a mirror image, while the fourth is a Y-shaped piece. The object is to assemble the pieces so they form an octahedron with three-sphere edges.

(Click to Enlarge)

George asked me if I wanted the puzzle unassembled, as an extra challenge, and being a puzzle lover... and solver, I happily agreed. A couple of weeks later, I had my blue unassembled Screwy Octahedron. At first, it's quite difficult to picture those four pieces forming an octahedron. More over, the Y-shaped piece is the hardest to figure out where it should be. After the initial fear that it would be a while until I was able to assemble this little devil, 20 minutes on, and the Screwy Octahedron was finally assembled. For the last piece to fit, it's necessary to apply a little force, but the pieces can take it, as the material is strong and flexible.

When I photographed the puzzle, I started by its assembled state and then took it apart again to photograph its pieces. Should've been the other way around, because this way I was going to have double the work, since I wanted to keep it in its solved shape. Much to my surprise, it took me almost half an hour to reassemble it. I guess I wasn't paying much attention on the first time. Needless to say, I'm yet to try a third time...

The Screwy Octahedron also has another fun use... You can use it as a Spin Top.


(Click to Enlarge)

The second puzzle I got from George is the Nuclear Fusion Puzzle in a dark-toned red, also 3D-printed by Shapeways. This one's a little smaller than the Screwy Octahedron. Three pieces, two identical, form a cube when correctly assembled. This time, instead of spheres, the puzzle is comprised by rhombic dodecahedra joined together.

One curious thing about the puzzle is that it has to be made in strong flexible plastic, otherwise it would make it impossible to assemble. It's as if the natural state of the pieces is to block each other and prevent assembly. More like the previous puzzle, a good amount of extra force is needed for the pieces to fit together, but nothing that will break it.

(Click to Enlarge)

Assembly was easier than the Screwy Octahedron, mainly because it has only three pieces and it's easier to visualize the solved shape. Unlike the first one, the Nuclear Fusion puzzle came already assembled, so the first challenge was to take it apart. It's less complicated than assembling it, but still fun to figure out how the pieces interact.

Closing Comments:

I was pleasantly surprised by George's designs. Two little puzzles, yet very original concept and a joy to play with. I would strongly recommend them to any puzzle enthusiast, as they're quite affordable and can be attempted by everyone.

Availability: The Screwy Octahedron and the Nuclear Fusion Puzzle are available at George's Shapways shop, starting at about $17 and $8.50 respectively.


Just Fit

Posted on May 25, 2012 by Gabriel | 0 comments
Labels: , , ,

(Click to Enlarge)
Just Fit, also called Devil's Chess, was designed by William Strijbos and won the Hikimi Puzzle Competition in 1990 (competition for wooden made puzzles only).

The puzzle is entirely made of hardwood with two contrasting colors that give it a great checkerboard appearance. Comes with a nice sized tray, measuring 12 x 12 x 4 cm (4.7" x 4.7" x 1.6"), and there are 16 pieces. Each piece is made out of two colors, and they represent all possible ways to have the tops cut at an angle. They can be joined together to form a two layer 4x4 checkerboard, but for that you need to follow a specific rule: The pieces must be joined only with opposite colors. In other words, the bottom layer starts with a white square in the top left, while the top layer starts with a black square in the top left.

(Click to Enlarge) - The 16 Pieces

There are many ways to join the pieces together (see a couple of examples below), but almost all of them will result in failure. This extremely hard puzzle will test your packing puzzle skills to the limit, but a fair share of luck might be needed as well. With 16 pieces, each with two parts that have cuts in four possible directions, you can imagine the number of possible *wrong* arrangements.


(Click to Enlarge)

My first attempt was to check for matches in the pieces two at a time, but I couldn't get all of them to match, always leaving one or two pairs without a possible connection. Another attempt was to try and fit the pieces four at a time, two at the bottom and two at the top, but with layers perpendicular to each other. Again, I was left with a couple of unmatched pieces. With already two unsuccessful attempts, the solution was starting to look all but straightforward.

My next strategy was to just lay out all the eight bottom layer pieces in a non-linear way and then, get the top layer pieces in a sort of random arrangement. I say "sort of", because if you're just laying out pieces completely at random, you might be doing that for a long while. When you start packing the top layer pieces, or even when you're still at the bottom layer, you need to check for incompatibilities with the remaining pieces, as there might be combinations that will not be possible to match. For this, I say "sort of random", like a controlled chaos.

I also mentioned above that a little luck might be needed, and from my experience that may be the case. Since you have to make a few random choices at the beginning, although you might be able to correct them afterwards, you at the mercy of luck for the following pieces to fit. I lost count to the amount of time I needed to solve the puzzle, but I reckon that it must have been more than two or three hours, combined in multiple sessions. A few days later, I scrambled the pieces again and until now, I wasn't able to solve it again. I'm not sure how many solutions are there, but I believe it might be more than one, mainly because of the high number of ways the pieces can be joined together.

Update: I was informed by the designer himself that there is indeed more than one solution.

(Click to Enlarge)

Closing Comments:

Just Fit is a very interesting concept and great looking puzzle that shouldn't be missed. Some of William's most popular puzzles are made of metal, so it's nice to see a wooden puzzle for a change. Packing puzzle fans will love the puzzle, and even though it's a hard puzzle, anyone can try to solve it.

Availability: The "Just Fit" puzzle came from Brilliant Puzzles, but as of the time of writing it's out of stock. You can check at another time to see if it's available again or you may want to try and contact the designer directly and ask for a copy.


Tricky Gift Box

Posted on May 24, 2012 by Gabriel | 2 comments
Labels: , , ,

(Click to Enlarge)
I have reviewed a few Trick Boxes before, and what I love about them is that when you finally open them, you always have that "Aha moment". They're a little different from the more popular ones, the Japanese Puzzle Boxes, where you need several sequential movements to open them. This type of boxes have primarily one or two basic moves, but it doesn't mean they're necessarily easier, as some of them are pretty tricky.

The Tricky Gift Box was actually based on a design by Allan Boardman, first presented at the 24th IPP, held in Tokyo. The name of the box is perfectly fitting, the "Aha Box", as that's what you'll probably say when you open it. One curious thing about Allan's puzzles is that his designs are quite small. This new and larger version is produced by the Finnish Tomas Lindén, owner of the Sloyd puzzle store. It's made from Birch, plywood and another "secret" material, and measures 13.8 x 8.5 x 2.8cm (5.4" x 3.3" x 1.1"). There's a thicker version available, with 4.5cm (1.8") instead of the 2.8cm.

The box is ideal to store a gift for a friend or a loved one, like money, jewelry, tickets, etc. If you offer this to someone easily frustrated, be careful though, as the box might be unrecognizable beyond repair afterwards...

There are so many types of trick boxes that each one has its own "personality". At first sight, the Tricky Gift Box seems impossible to open. There are no obvious parts to pull, slide or lift that give away the solution. Note that no extra tools are necessary in order to open it. There's only a subtle difference between the two opposite bases, as one of them shows small gaps.

(Click to Enlarge) - The "Other Side"

When I first tried to open the box I could hear a rattle sound, indicating that it might had some movable locking mechanism. I won't give too much about its actual solution, however I can tell you what you don't need to do. After I opened the box, I finally knew where that sound came from... It had nothing to do with the solving process, just a small prank by Tomas. Inside was a small card congratulating me for opening the box. Nice one, Tomas ;-)

(Click to Enlarge) - Opened

I got two Trick Boxes from Tomas and solved both of them on the same day: This one and another called "Treasure Chest". I solved first the Treasure Chest in about 15 minutes, and then the Tricky Gift Box within 10 minutes. Judging by the solving time, one might say that the Tricky Gift Box is easier than the other one, but after analyzing the two, I actually think that the Gift Box is a little more complex with its mechanism. I reckon I might have had a little help from solving them one right after the other, which allowed me to reduce the solving time... And there's another reason, but I better not tell you, otherwise I would be giving too much away about its secret.

Closing Comments:

The Tricky Gift Box is a cleverly thought concept that will sure surprise you once you figure out its secret. It makes for a perfect gift, although you already knew that by its suggestive name, and for a Trick Box with only one move, you're bound to get puzzled for a while.

Availability: The Tricky Gift Box is available at Sloyd.fi for just €10. As mentioned above, there's also a thicker version for €12.


Noah's Ark Puzzle

Posted on May 23, 2012 by Gabriel | 0 comments
Labels: , , , ,

(Click to Enlarge)
Today, I present you with another great Picture Frame Puzzle design, produced exclusively by Puzzle Crafthouse. Created by Dave Janelle, the Noah's Ark Puzzle is a beautiful interpretation of the Bible's narrative and is the latest addition to their Picture Frame series.

Depicted in the puzzle are Noah himself and five animal species, for a total of 11 pieces. Each piece is thoroughly detailed with perfect deep-cut lines, and the frame measures about 17.7 x 19.5cm (7" x 7.7"). Dave had a great idea of having six different woods in the puzzle, giving each animal species and Noah their own identity, creating this way a stunning visual effect. Note that each puzzle will have a different wood mix. Another design choice worth praising is that the traditional squared frame was dropped over a more original one, a boat-shaped frame.

The puzzle is rated at a level 3/5+, and judging by the difficulty I encountered with previous puzzles, I'd say it's about right. It's definitely easier than last week's Flower Garden - Hawaii. Solving time for the Noah's Ark was about 30 minutes.

After solving the puzzle, I was in for a surprise. When comparing my solution against the one provided with the puzzle, I saw that they were quite different in the piece arrangement, except for a few common ones. This goes against what I've been thinking, which is that these puzzles are so unique in the way their pieces fit that it must indicate one single solution. This time, I was wrong and there's at least two solutions... Or it may just be a coincidence that the pieces fit in another unexpected arrangement. There's no force applied, since the pieces still have a little wiggle room after they're all placed inside the frame.

I also found a third solution, but in my opinion it doesn't count, as one of the pieces had to be flipped. As you may know, the pieces in this type of puzzles are not supposed to be used on their backside, because the deep cuts with details are only visible on one side. The other side is just blank. If you're not picky about it, though, let's say it has at least three solutions.

Update: I now know that Dave has a new version of this puzzle with different sizes for the animals, reducing the gaps between them. So, the current version is back to one solution only. This is true for the other Picture Frame Puzzles too. Should you find a second solution in any of his designs, contact Dave, so he can adjust the design back to one solution.

Solution: Here's mine, and here's the one that was on the solution sheet.

(Click to Enlarge)

Closing Comments:

Another brilliant idea by Dave Janelle, adding another great puzzle to the already wide selection of his Picture Frame Puzzles. Whether you're a religious person, or just a puzzle lover like me, this puzzle is definitely worth a try.

With such a sheer variety of species in the animal kingdom, I look forward for a Noah's Ark II.

Availability: You can find the Noah's Ark at Puzzle Crafthouse for $25. There's also a Beetlekill Pine version for the same price.


Cast Donuts (連)

Posted on May 22, 2012 by Gabriel | 2 comments
Labels: , , , ,

(Click to Enlarge)
In an effort to review all Cast Puzzles by the end of the year, this week I bring you yet another one of Hanayama's flagship products, the Cast Donuts. This is the most recent addition to the series, released in September 2011 and it was designed by the Finnish Vesa Timonen. The key word for the Donuts is "string".

The Donuts are, as the name suggests, two intertwined ring shapes that need to be separated. The solved puzzle has four pieces, as each ring is sliced in two. Figuring out how they are interlocked and what movements you need to perform is the hard part, but an experience Cast Puzzle solver will do it in no time.

I was surprised by how small this puzzle is. Most Cast Puzzles are relatively small, but this one is among the smallest ones, measuring 4.7 x 3.5cm (1.9" x 1.4"). If you have big hands, you're going to have trouble manipulating it. Another drawback, at least for me, is that the coating finish combined with its small size made it even harder to solve, as I sweat quite a bit from my hands, making it very slippery at times. Maybe a different coating with a rough surface would've helped.

(Click to Enlarge) - Partially Disassembled

Design-wise, the puzzle looks stunning. Even though it makes it slippery, the coating gives it a shiny appearance and the surface feels very smooth. In order to distinguish both rings, they were coated with two different color tones.

This is a level 4/6 rated by Hanayama and a 8/10 by PuzzleMaster. After solving the puzzle, maybe a little more than half an hour, and looking at the inner structure, I wouldn't disagree if it were classified as a level 5/6. Although experienced puzzlers won't find it that hard, casual players will struggle quite a bit to decode the right movements to separate the rings.

While looking at the puzzle for the first time, it seems pretty obvious that the lines dividing the rings are there for a reason and that they must be aligned somehow. However, it's not that simple. Giving the nature of the puzzle, it's hard to get the two parts of one ring to stay apart, while working on the other ring, without getting your fingernails inside the gaps. The first time I tried this, I ended up hurting one of my fingers with part of my fingernail chipped off. Sounds horrible, but it healed fast.

A few weeks passed before I made another attempt at solving the darn puzzle, but I was determined to get it over with. So, with more caution, there I was trying not to get another fingernail eaten by the mighty donuts. A little more than 30 minutes later, the rings were finally separated. Now, all there was left was getting the rings to their intertwined state again. It was harder than I was expecting, because when I separated them I couldn't pay much attention, as the pieces just fell down on the table. I eventually got it right in less time than I needed to solve it.

After knowing how the puzzle works and looking at the key word (string), which is supposed to be a hint, I honestly don't know how's that supposed to help in the solving process. Maybe I'm still missing something... Want a hint? - Try "slide".

Solution: Click here for a .pdf of the solution, or here for a video solution.

(Click to Enlarge)

Closing Comments:

Great concept by Vesa Timonen. The Cast Donuts is a very welcoming addition to Cast Series family, although with a couple of drawbacks regarding the design. For a level 4 puzzle, it'll put up a fight.

Availability: The Cast Donuts is available at PuzzleMaster for about $13 CAD. Click here to access the entire Hanayama Cast Series.

Links:

Hanayama Cast (in English) - Very useful website in English, with plenty of information on all things Cast.

Hanayama's Factory Visit (Many thanks to Roxanne Wong for sharing these pictures)


Way

Posted on May 21, 2012 by Gabriel | 1 comments
Labels: , ,

(Click to Enlarge)
Last year's 31st IPP had some amazing puzzles for the Design Competition, and a few of those have already been reviewed in the blog. Way, by German Volker Latussek, is another great example of this prestigious competition.

"Way" is more than a simple puzzle. It's a puzzle construction set. The box, built with recycled cardboard materials, comes with 18 pieces/segments made from Beech wood in 4 different types: six C's, four I's, six L's and two S's. All pieces measure 6.8cm in height and 3.4cm in diameter (2.7" x 1.3"). With its pieces, you can solve countless challenges, assembling 2D and 3D structures. The resulting free-standing circuits have to be closed paths, no beginning or end.

(Click to Enlarge) - The Four Types of Pieces: C I L S

Also included in the box is a challenge card with eight puzzles, in different levels of difficulty, to get you started. For many more challenges, just visit the official puzzle's website. The puzzles vary in number of pieces used, which can go between only 2, up to 18. The only way to do a two-piece circuit is with two C segments. The first four challenges have a picture with the solution, but the following ones (currently 54 published) do not, so you're on your own.

The good thing about the puzzle is that the blocks are quite sturdy and easy to manipulate. You'd think that with more complex circuits, the structure would just collapse in a second, but the weight that the segments put on each other, the circuit becomes very stable once assembled. Now, to get it assembled, that's another story.

While the final shape of the circuit may be stable, the assembling process, mainly when you're building a 3D structure, can be rather difficult. Many times, I found myself struggling to get the pieces to stand without collapsing, resulting in several failed attempts before I was able to succeed. If you can, get someone to help you with the assembling on the harder challenges, as it will become much easier to hold the pieces in place while you fit the remaining ones.

(Click to Enlarge) - 2D & 3D Circuits

As mentioned above, at the time of writing, there are 54 challenges on the puzzle's website. I will list a few ones in 2D and 3D, so you can have a better idea of the types of challenges you're expected to solve. Below, you will only see a picture of the needed pieces for that particular challenge, and if you want to see the final shape, click on the link that will show the solution, to avoid spoilers.

This is challenge #6 and requires six blocks: 2 L's, 1 S and 3 C's. The catch is that you can only have one of the two L's touching the horizontal surface. To see the solution, click here.

(Click to Enlarge) - Challenge #6 (Pieces Needed)

Next is challenge #7, and this one requires all 18 pieces. The goal is to have a single large circuit that occupies the entire box area. In other words, a 2D puzzle with a 6x6 grid. There are several ways to accomplish this. It might sound a little complicated, but you should be able to solve it within 10 or 15 minutes. Here's one. Update: There are three different solutions.

The next challenge that I've tried was #28, and with 9 blocks (4 L's, 1 S, 4 C's) you're required to build a 3D circuit with a 3x3x2 area. The S piece is the harder one to place, but once you figure out that it can only be in one spot, the others are easier to get in place. Here's the final shape.

(Click to Enlarge) - Challenge #28 (Pieces Needed)

This one's very interesting and one of my favorites, #34: With 12 blocks (1 I, 6 L's, 2 S's, 3 C's), your goal is to build two identical circuits with six pieces each. The hard part is to figure out which pieces to use in each circuit. Not sure how many ways are there for this, but here's one. Update: There's only way to solve this one.

(Click to Enlarge) - Challenge #34 (Pieces Needed)

And here's #45, a hard one to assemble, mainly because the blocks kept falling before I was able to place the final one. With eight blocks (2 L's and 6 C's), the challenge is to assemble a 3D circuit with a 2x2x4 area. Here's the solution.

(Click to Enlarge) - Challenge #45 (Pieces Needed)

Finally, I'll just give you an example of the many challenges you can come up for yourself. This way, it will keep you entertained until the next available challenge on the site. For this one, I thought of using two pieces of each type, eight in total, and build a circuit with them. It took me a little while to figure it out, but here it is.

(Click to Enlarge) - My Own Challenge (Pieces Needed)

Closing Comments:

"Way" is an excellent puzzle tool. I've been mentioning this for quite a while: Puzzles that offer you many challenges are worth every penny you spend. Not only it will give you plenty of value for your money, but it gives you a chance of keep playing with it for weeks or months to come. Keep checking the official site for more puzzles, as the author has been supporting it since June 2011 with regular updates.

"Way" also received favorable reviews from my fellow puzzle bloggers, Brian and Neil.

Availability: To get a copy of your "Way" puzzle set, contact Dr. Volker Latussek.


Related Posts Plugin for WordPress, Blogger...